
The Best Fluffy Pancakes recipe you will fall in love with. Full of tips and tricks to help you make the best pancakes.

Table of Contents
Did you know that Americans consume over 25 billion pounds of beef annually, with steak ranking as one of the most sought-after cuts? Yet despite this love affair with beef, many home cooks feel intimidated by preparing steak, believing that achieving restaurant-quality results requires professional training or expensive equipment. The truth is that mastering steak recipes at home is far more accessible than most people think. With the right techniques, proper seasoning, and an understanding of doneness levels, you can transform an ordinary weeknight dinner into an extraordinary culinary experience.
Whether you’re working with a budget-friendly sirloin or splurging on a ribeye, the principles remain the same. This comprehensive guide will teach you proven steak-cooking techniques that can impress family and guests while building your confidence in the kitchen. From classic preparations to innovative flavor combinations, you’ll learn how different cuts, cooking methods, and accompaniments can elevate your home cooking and help you achieve restaurant-quality results every time.
Ingredients
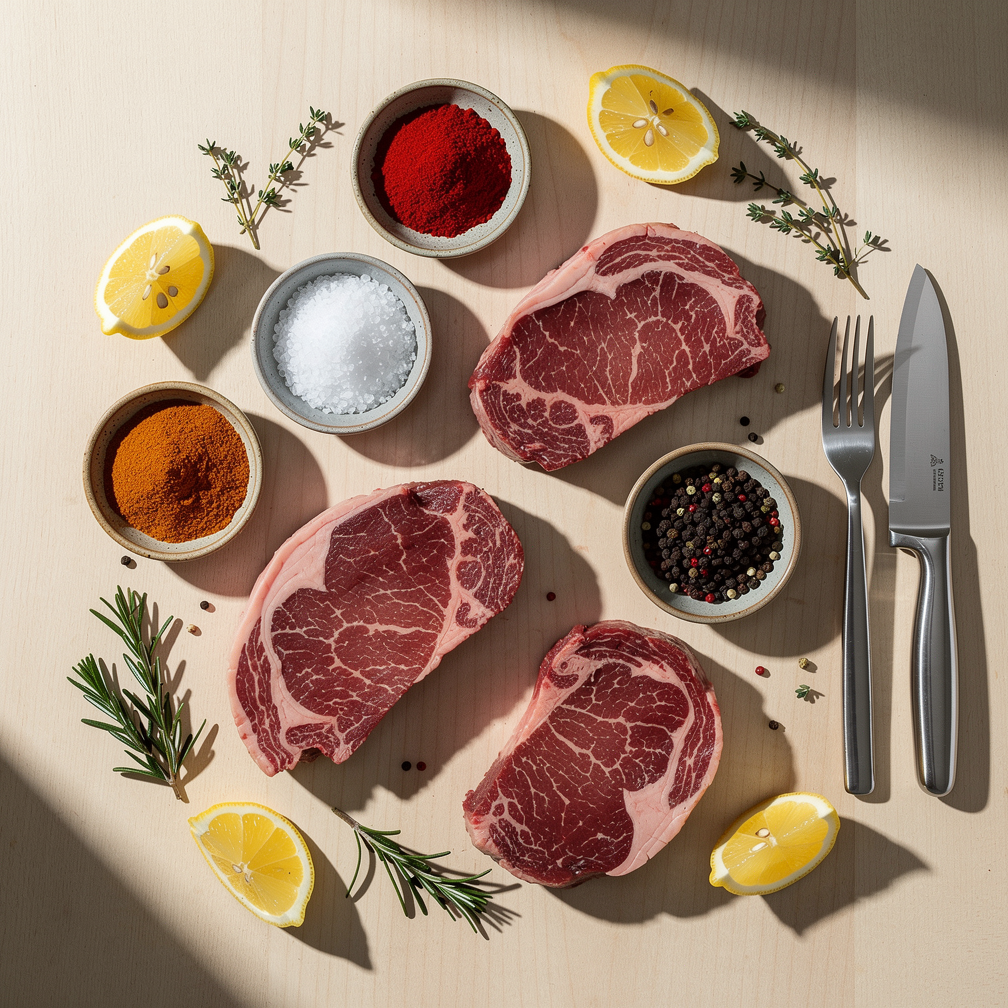
The foundation of exceptional steak recipes begins with quality ingredients. Here’s what you’ll need for a classic preparation that serves as the baseline for all variations:
Core Ingredients:
- 2 high-quality steaks, 1 to 1.5 inches thick (ribeye, New York strip, filet mignon, or sirloin)
- 2 tablespoons high-heat cooking oil (avocado oil, grapeseed oil, or clarified butter)
- 2 teaspoons coarse kosher salt or sea salt
- 1 teaspoon freshly ground black pepper
- 3 tablespoons unsalted butter
- 4 fresh garlic cloves, smashed but skin-on
- 4 sprigs fresh thyme or rosemary
Optional Enhancement Ingredients:
- 2 tablespoons Worcestershire sauce for depth
- 1 teaspoon smoked paprika for a subtle smokiness
- 1 tablespoon minced fresh herbs (parsley, chives, or tarragon)
- Flaky finishing salt for texture and presentation
Substitutions:
- If you don’t have fresh herbs, dried herbs work at half the quantity
- Vegetable oil can replace specialized cooking oils in a pinch
- Regular table salt works but use slightly less due to its finer grain
- Ghee makes an excellent substitute for butter, especially for higher heat cooking
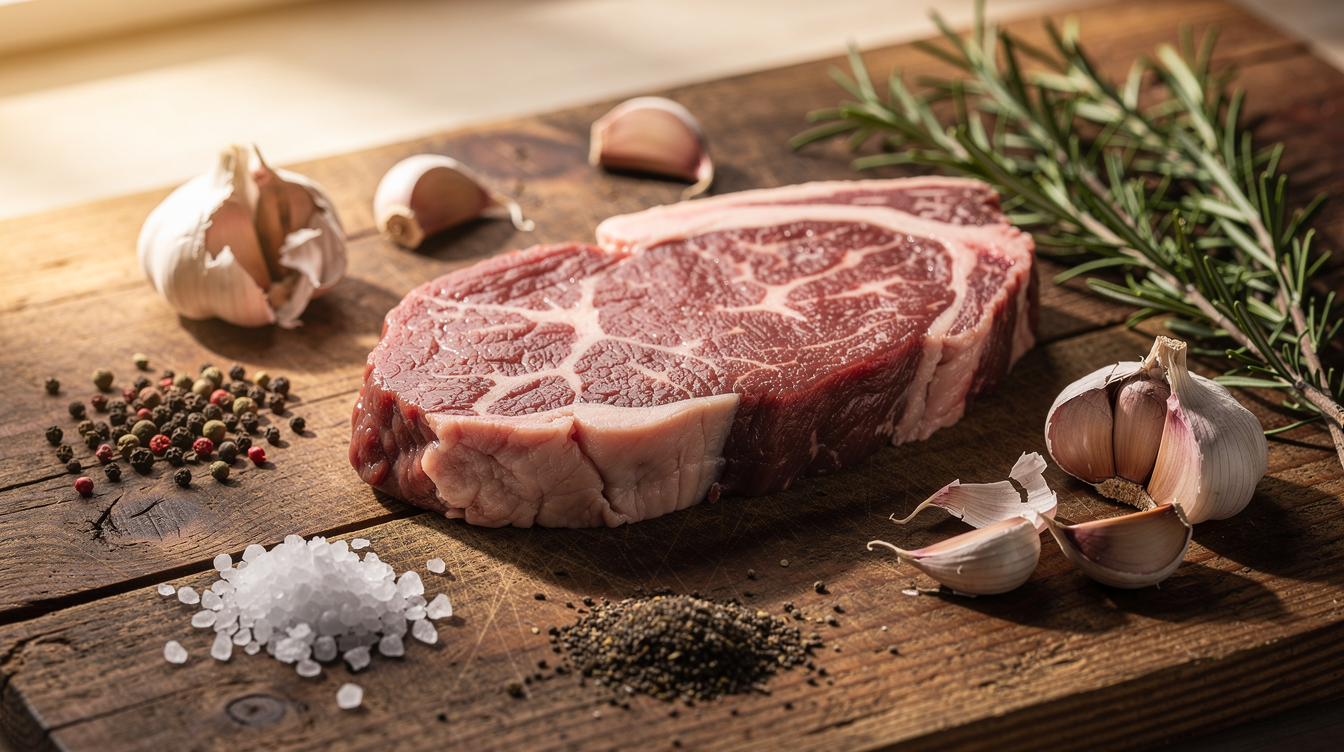
The sensory experience starts with selecting meat that’s deep red with white or cream-colored marbling running throughout. The fat should feel firm to the touch, and the meat should have a fresh, clean smell. Quality ingredients make the difference between good and extraordinary results.
Timing
Understanding timing is crucial for perfectly executed steak recipes. Here’s the breakdown:
Preparation Time: 10-15 minutes This includes removing steaks from refrigeration, patting them dry, seasoning, and gathering your cooking equipment. Steaks should rest at room temperature for about 30-45 minutes before cooking for even heat distribution.
Cooking Time: 8-14 minutes Actual cooking time depends on thickness, desired doneness, and cooking method. A 1-inch thick steak cooked to medium-rare typically needs 3-4 minutes per side plus 2 minutes for basting. Thicker cuts require longer, while thinner cuts cook faster.
Resting Time: 5-10 minutes This non-negotiable step allows juices to redistribute throughout the meat. Think of this as the difference between a juicy steak and one that bleeds all over your plate.
Total Time: 23-39 minutes
For context, this is less time than ordering takeout and waiting for delivery, yet the results rival steakhouses that charge fifty dollars or more per entrée. The investment of less than forty minutes yields restaurant-quality results that cost a fraction of dining out.
Step-by-Step Instructions
Step 1: Prepare Your Steak
Remove steaks from the refrigerator 30-45 minutes before cooking. This crucial step ensures even cooking from edge to center. Pat them completely dry with paper towels, as moisture is the enemy of a good sear. Season generously with salt and pepper on both sides, pressing the seasoning into the meat. The salt will begin to draw out moisture, then reabsorb it along with the seasoning, creating a flavorful crust. Don’t be shy with salt; much of it will stay on the cooking surface.
Step 2: Preheat Your Cooking Surface
Whether using a cast-iron skillet, stainless steel pan, or grill, proper preheating is essential. For stovetop cooking, heat your pan over medium-high to high heat for 5 minutes. You want it smoking hot. Add your high-heat oil and swirl to coat. The oil should shimmer and barely smoke. For grilling, preheat to 450-500 degrees Fahrenheit, ensuring grates are clean and oiled. A properly heated cooking surface creates the Maillard reaction, that beautiful brown crust that defines great steak preparations.
Step 3: Sear the First Side
Place your steak in the pan or on the grill away from you to avoid oil splatter. Resist the urge to move, press, or flip it. Let it cook undisturbed for 3-4 minutes. You’re building a crust through sustained contact with the hot surface. The steak will naturally release when ready to flip. If it sticks, it needs more time. Listen for that satisfying sizzle; silence means your pan wasn’t hot enough.
Step 4: Flip and Sear the Second Side
Using tongs, flip the steak once. Add butter, smashed garlic cloves, and fresh herbs to the pan. As the butter melts and foams, tilt the pan slightly and use a spoon to continuously baste the steak with the aromatic butter. This technique, common in professional kitchens, adds incredible flavor and helps cook the steak evenly. Continue for another 3-4 minutes while basting every 30 seconds. how to cook flank steak This is where your steak transforms from good to spectacular.
Step 5: Check for Doneness
Use an instant-read thermometer inserted into the thickest part of the steak. For rare, aim for 120-125 degrees Fahrenheit; medium-rare is 130-135; medium is 135-145; medium-well is 145-155; and well-done is 155 and above. Remember that temperature will rise 5 degrees during resting. Alternatively, use the touch method: rare feels like the fleshy part of your palm when relaxed, medium-rare when touching thumb to index finger, medium with thumb to middle finger, and so on.
Step 6: Rest Your Steak
Transfer the steak to a cutting board or plate and tent loosely with foil. Let it rest for 5-10 minutes. This allows muscle fibers to relax and juices to redistribute. Cutting immediately causes all those flavorful juices to run out onto your board instead of staying in the meat. Use this time to prepare your sides or make a quick pan sauce from the drippings.
Step 7: Slice and Serve
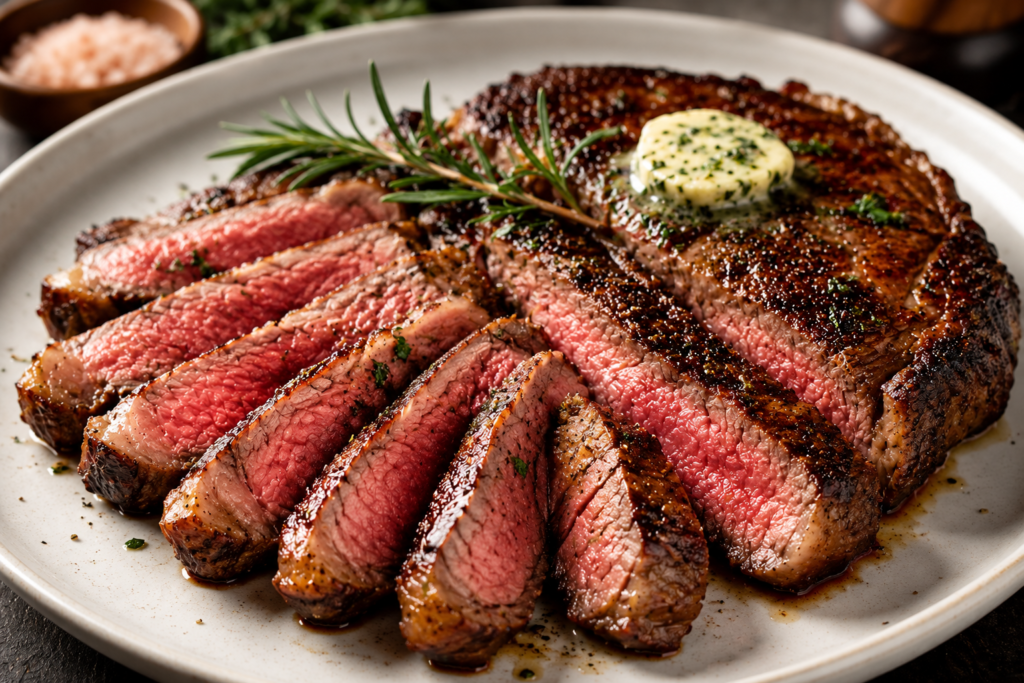
For steaks like flank or skirt, slice against the grain in thin strips at a slight angle. For thick steaks like ribeye or strip, you can serve whole or slice into thick pieces. Top with any accumulated juices from the cutting board, a pat of compound butter, or a drizzle of finishing sauce. Sprinkle with flaky salt for texture and visual appeal.

Nutritional Information
Understanding the nutritional profile of your steak recipes helps you make informed dietary choices. Here’s the approximate nutritional breakdown for a 6-ounce serving of cooked ribeye steak:
- Calories: 420-450
- Total Fat: 32-35g
- Saturated Fat: 13-15g
- Cholesterol: 135-145mg
- Sodium: 85-95mg (before added salt)
- Protein: 35-38g
- Iron: 15-18% of Daily Value
- Zinc: 40-45% of Daily Value
- Vitamin B12: 60-70% of Daily Value
- Niacin: 25-30% of Daily Value
Leaner cuts like sirloin or filet mignon offer different profiles:
- Calories: 310-340
- Total Fat: 16-19g
- Saturated Fat: 6-8g
- Cholesterol: 125-135mg
- Protein: 38-42g
Steak provides high-quality complete protein with all essential amino acids. It’s particularly rich in vitamin B12, which is crucial for nerve function and red blood cell formation. The iron in beef is heme iron, which is more readily absorbed by the body than plant-based non-heme iron. Zinc supports immune function and wound healing. While steak is higher in saturated fat, moderate consumption as part of a balanced diet fits within most nutritional guidelines. The fat also provides satiety, keeping you fuller longer compared to leaner proteins.
Healthier Alternatives
You can adapt steak recipes to meet various dietary needs and health goals without sacrificing flavor:
For Lower Fat Content: Choose sirloin, tenderloin, or eye of round cuts, which contain significantly less marbling. Trim visible fat before cooking. These cuts are naturally leaner while still providing excellent protein. Use cooking spray instead of oil, and skip the butter basting, relying instead on herb rubs for flavor.
For Reduced Sodium: Season with garlic powder, onion powder, smoked paprika, and black pepper instead of salt. Add fresh citrus juice after cooking for brightness. Many commercial steak seasonings are high in sodium, so making your own blend gives you control. You can still achieve a flavorful crust using spices that caramelize during cooking.
For Heart Health: Pair your steak with fiber-rich vegetables and whole grains to balance the meal. Consider grass-fed beef, which contains higher levels of omega-3 fatty acids compared to conventional beef. Limit portion sizes to 4-5 ounces and fill the rest of your plate with nutrient-dense sides.
Plant-Based Alternative: While not traditional steak, thick-cut portobello mushrooms or cauliflower steaks can be prepared using similar techniques. Marinate in balsamic vinegar, soy sauce, and garlic, then grill or sear. They develop a meaty texture and umami flavor that satisfies similar cravings.
For Gluten-Free Diets: Most basic steak preparations are naturally gluten-free. Be cautious with marinades or sauces that may contain soy sauce or thickeners. Use tamari instead of regular soy sauce, and thicken sauces with cornstarch rather than flour.
Serving Suggestions
The versatility of steak recipes allows for countless pairing options that complement the rich, savory meat:
Classic Steakhouse Style: Serve your perfectly cooked steak alongside creamy mashed potatoes, roasted asparagus with lemon, and a wedge salad with blue cheese dressing. Add crispy onion strings on top for textural contrast. This timeless combination never disappoints and feels appropriately indulgent.
Mediterranean Approach: Pair sliced steak with a Greek salad featuring tomatoes, cucumbers, red onion, olives, and feta cheese. Add warm pita bread and tzatziki sauce. easy Mongolian beef recipe The bright, acidic components cut through the richness of the beef beautifully.
Latin-Inspired Presentation: Slice steak thinly and serve over cilantro-lime rice with black beans, grilled peppers and onions, fresh pico de gallo, and warm tortillas. This transforms your steak into interactive fajitas that are perfect for family-style dining.
Asian Fusion: Top steak with a ginger-scallion sauce and serve alongside stir-fried vegetables and jasmine rice. Add sesame seeds and a drizzle of sesame oil for authentic flavor. The aromatic elements complement beef exceptionally well.
Low-Carb Option: Serve steak over a bed of arugula and cherry tomatoes dressed with olive oil and balsamic vinegar. Add shaved Parmesan and toasted pine nuts. The peppery greens provide a fresh contrast to the rich meat.
Sauce Pairings: Elevate your steak with compound butters featuring herbs, garlic, or blue cheese. Classic sauces include béarnaise, peppercorn cream sauce, chimichurri, or a simple red wine reduction. A well-chosen sauce adds restaurant polish to your presentation.
Common Mistakes to Avoid
Even experienced cooks make errors when preparing steak recipes. Here are the most frequent pitfalls and how to avoid them:
Cooking Cold Steak: Many home cooks take steak directly from refrigerator to pan. This results in overcooked exteriors and undercooked centers. Studies show that room-temperature meat cooks 30 percent more evenly than cold meat. Always allow 30-45 minutes for steaks to come to room temperature before cooking.
Not Drying the Surface: Moisture prevents proper browning and steaming occurs instead of searing. The Maillard reaction requires dry heat and dry surfaces. Pat your steaks thoroughly with paper towels before seasoning. This simple step dramatically improves crust formation.
Using Low Heat: Fear of smoke or mess leads many to use medium or medium-low heat. This extends cooking time and results in gray, steamed meat rather than a caramelized crust. Professional kitchens use high heat for a reason. Embrace the smoke and sizzle; that’s where flavor develops.
Flipping Repeatedly: Constantly flipping steaks prevents proper crust development. While some chefs advocate for the continuous flip method, beginners achieve better results with the single-flip approach. Let each side develop its crust undisturbed for 3-4 minutes.
Skipping the Rest Period: Impatience causes many to cut into steaks immediately after cooking. This releases all the juices that should stay in the meat. Resting is as important as proper cooking temperature. Plan this into your timing so sides are ready when the steak finishes resting.
Not Using a Thermometer: Guessing doneness leads to inconsistent results. Even experienced chefs use thermometers. An instant-read thermometer removes guesswork and ensures perfect results every time. This tool is worth the small investment for consistent success.
Over-Seasoning or Under-Seasoning: Finding the right balance takes practice. A good rule is to season more generously than feels comfortable. Much seasoning stays on the cooking surface, so what seems like too much is usually just right. Taste and adjust your approach over time.
Storing Tips
Proper storage ensures you can enjoy leftover steak while maintaining quality and safety:
Refrigerating Cooked Steak: Allow steak to cool to room temperature within two hours of cooking. Wrap tightly in aluminum foil or place in an airtight container. Properly stored cooked steak lasts 3-4 days in the refrigerator. Store any accompanying sauces separately to prevent sogginess.
Freezing Cooked Steak: Wrap individual portions tightly in plastic wrap, then aluminum foil, removing as much air as possible. Label with the date and type of steak. Frozen cooked steak maintains quality for 2-3 months. Thaw overnight in the refrigerator before reheating.
Reheating Without Drying Out: The challenge with leftover steak is avoiding overcooking during reheating. The best method is a low-temperature oven. Place steak on a wire rack over a baking sheet and heat at 250 degrees Fahrenheit until warmed through, about 20-30 minutes. This gentle approach preserves moisture and texture. Alternatively, slice cold steak thinly and quickly sear in a hot pan for just 30 seconds per side.
Storing Raw Steak: Keep raw steak in its original packaging in the coldest part of your refrigerator for up to 3-5 days from purchase. For longer storage, freeze in the original packaging for up to 6 months, or rewrap in freezer paper or vacuum-seal for up to 12 months.
Meal Prep Considerations: If planning to use steak in meal prep, slightly undercook it initially since it will continue cooking slightly when reheated. Store with wet components separate from the meat to prevent texture degradation. Sliced steak reheats more successfully than whole steaks.
Conclusion
Mastering steak recipes at home transforms ordinary meals into restaurant-quality experiences. With proper technique, quality ingredients, and attention to timing and temperature, you can achieve steakhouse results in your own kitchen. Try these methods and discover your favorite preparations. Share your results in the comments below and subscribe for more cooking techniques that elevate your home cooking.
Frequently Asked Questions
What is the best way to tell if my steak is done without a thermometer?
The touch test is the most reliable method without a thermometer. Touch the fleshy part of your palm below your thumb while your hand is relaxed; this feels like rare steak. Touch your thumb to your index finger and feel that same spot; this resembles medium-rare. Thumb to middle finger feels like medium, thumb to ring finger is medium-well, and thumb to pinky feels like well-done.
Additionally, you can make a small cut in the thickest part of the steak to check the color, though this releases some juices. With practice, you’ll develop an intuitive sense for doneness based on cooking time and the firmness of the meat when pressed. Internal temperature remains the most accurate way to determine doneness, so investing in an instant-read thermometer is still the best approach for consistent results.
Should I marinate steak, and for how long?
Marinating depends on the cut and desired flavor profile. Tender cuts like ribeye, strip, and filet mignon don’t require marinating as their natural flavor and tenderness are their strengths. A simple seasoning of salt and pepper suffices. However, tougher cuts like flank, skirt, or round benefit from marinating, which adds flavor and helps tenderize through acidic ingredients like vinegar, citrus juice, or wine.
Marinate tender cuts for 2-4 hours maximum, as longer periods can make the exterior mushy. Tougher cuts can marinate for 4-24 hours. Always marinate in the refrigerator in a non-reactive container like glass or plastic. Pat the meat dry before cooking to ensure proper browning. Remember that marinades penetrate only about a quarter inch into the meat, so they affect primarily the surface flavor.
How do I prevent my steak from sticking to the pan or grill?
Sticking occurs due to three main reasons: insufficient heat, not enough oil, or flipping too early. First, ensure your cooking surface is properly preheated until very hot, which creates an immediate sear that naturally releases. Second, use adequate high-heat oil with a smoke point above 400 degrees Fahrenheit, such as avocado or grapeseed oil. Coat the entire cooking surface.
For grills, oil the grates using tongs holding an oil-soaked paper towel. Third, resist the urge to move or flip the steak prematurely. Protein bonds to metal when first placed but releases naturally once a crust forms. If the steak resists flipping after 3-4 minutes, give it another 30-60 seconds. A properly seared steak will release easily when ready. For cast iron pans, ensure they’re well-seasoned. Stainless steel requires slightly more oil but produces excellent results with proper technique.
What’s the difference between prime, choice, and select steak?
These USDA beef grades indicate quality based on marbling and maturity. Prime represents the highest grade, comprising only about 2 percent of beef production. It features abundant marbling throughout, resulting in exceptional tenderness, juiciness, and flavor. Prime is typically found at high-end restaurants and specialty butchers. Choice grade, making up about 50 percent of production, has moderate marbling and offers excellent quality at a more accessible price point.
Most supermarkets carry choice grade, which delivers excellent results for home cooking. Select grade has less marbling, making it leaner but often less tender and flavorful. It requires careful cooking to prevent dryness and maintain a pleasant texture. For special occasions, prime beef offers exceptional tenderness, juiciness, and rich flavor, while choice grade provides the best balance of quality and affordability for everyday meals. Ultimately, proper seasoning, cooking technique, and resting time have a greater impact on the final result than the grade alone, allowing skilled home cooks to create delicious steaks from almost any cut.
Why is it important to let steak rest after cooking?
Resting allows the steak’s muscle fibers to relax and juices to redistribute throughout the meat. During cooking, heat drives moisture toward the center and causes proteins to contract tightly. Cutting immediately causes all those concentrated juices to flow out onto the cutting board, resulting in dry meat and a puddle of flavorful liquid. Resting for 5-10 minutes allows the temperature to equalize and proteins to relax, enabling the meat to reabsorb and hold onto its juices.
The internal temperature will rise about 5 degrees during resting, a phenomenon called carryover cooking, which is why you should remove steak from heat 5 degrees before your target temperature. Tenting loosely with foil keeps it warm without trapping too much steam, which can soften the crust. This simple step makes the difference between a good steak and a great one. Professional chefs never skip this crucial step, and neither should home cooks seeking restaurant-quality results.