
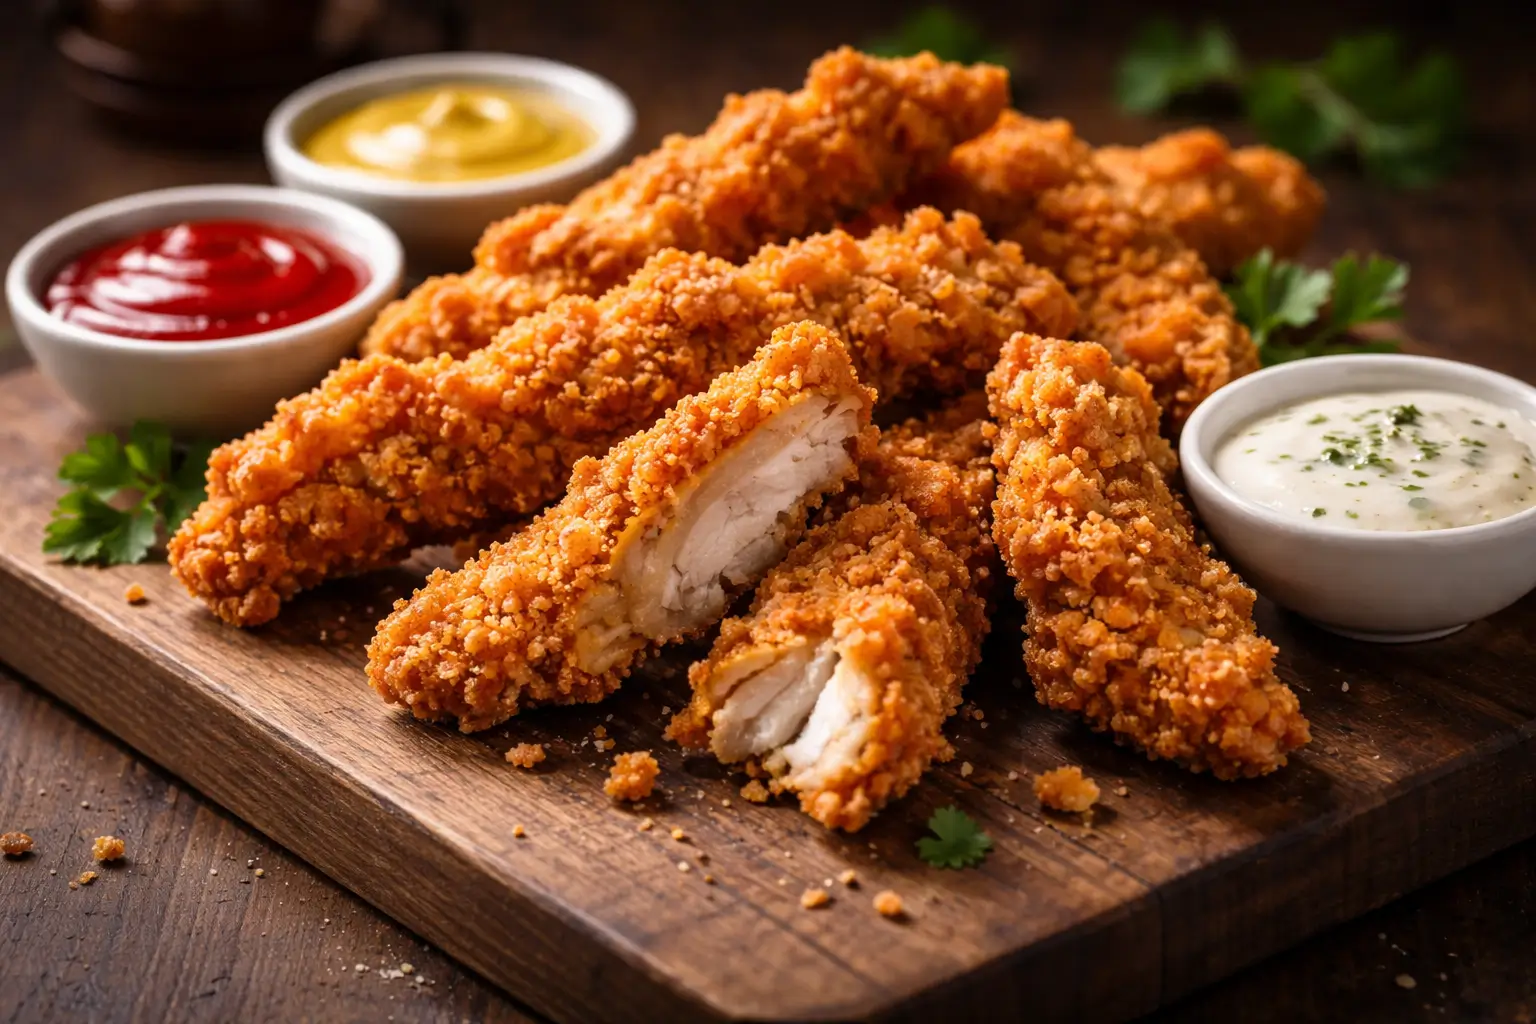
The Best Fried Chicken Strips Recipe
What Makes a Fried Chicken Strip Truly Unforgettable?
Is it the crunch? The seasoning? The tenderness of the chicken inside? According to a 2023 food industry report by Technomic, fried chicken is the single most ordered item across American fast-casual restaurants — and chicken strips specifically rank as the top choice for families with children.
Yet despite their popularity, most home cooks have never attempted a fried chicken strips recipe from scratch, assuming it requires professional equipment or complicated technique. That assumption, it turns out, is completely wrong.
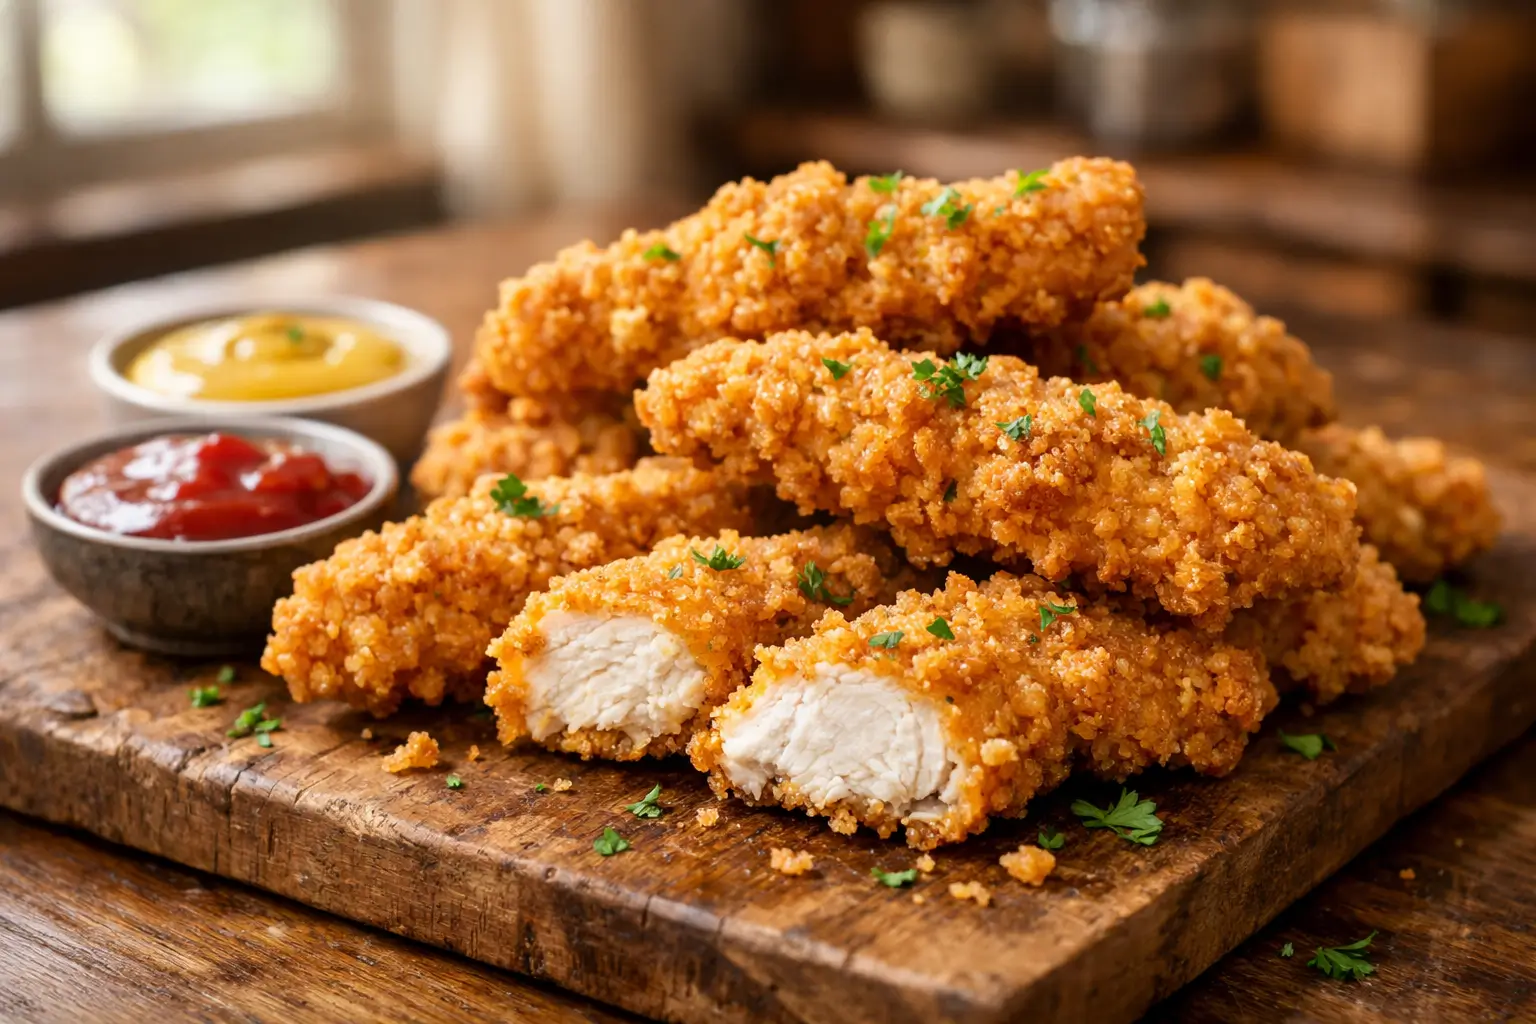
A great fried chicken strips recipe requires nothing more than a deep skillet, a handful of pantry staples, and a clear understanding of a few key principles. The result — golden, shatteringly crispy on the outside, juicy and tender on the inside — is something that fast food simply cannot replicate.
This guide walks you through every detail: the ideal marinade, the perfect coating, the right frying temperature, and everything in between. By the end, you will have a go-to recipe that your family will request every single week.
Table of Contents
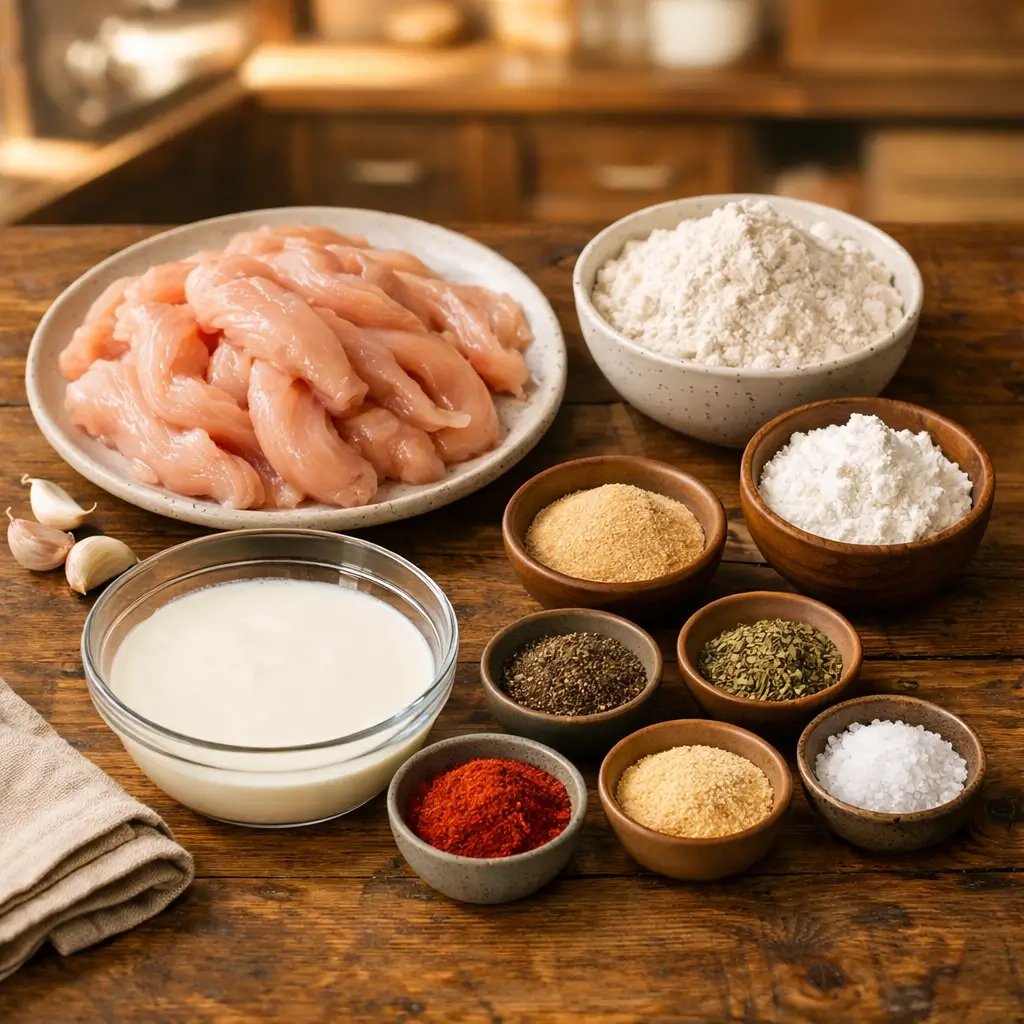
Ingredients for the Best Fried Chicken Strips Recipe
Every component of this ingredient list serves a specific purpose. Nothing is here by accident, and every substitution suggestion is tested and approved. This recipe makes approximately 16 to 18 strips, serving 4 people generously.
The Chicken
- 2 lbs boneless, skinless chicken breasts or tenders — if using breasts, slice them lengthwise into strips roughly 1 inch wide and 4 inches long (sub: chicken thighs for a richer, more forgiving cut that stays juicier under high heat)
The Buttermilk Marinade
- 1.5 cups buttermilk — the lactic acid in buttermilk tenderizes the chicken proteins and helps the coating adhere (sub: 1.5 cups whole milk plus 1.5 tablespoons white vinegar, stirred and rested 5 minutes)
- 1 tsp hot sauce — adds a subtle background heat and deepens the marinade’s flavor without making the finished strips spicy
- 1 tsp salt
- 1/2 tsp black pepper
- 1/2 tsp garlic powder
The Coating
- 2 cups all-purpose flour — the structural base of the crispy crust (sub: gluten-free all-purpose flour blend for a GF version)
- 1/2 cup cornstarch — the secret weapon for an exceptionally light, crispy texture; cornstarch reduces gluten development in the coating, which results in a crunchier crust
- 2 tsp salt
- 1.5 tsp black pepper — freshly cracked
- 1.5 tsp garlic powder
- 1 tsp onion powder
- 1 tsp smoked paprika — adds color and a gentle smokiness to the finished crust
- 1 tsp dried oregano
- 1/2 tsp cayenne pepper — adjust up or down based on your heat preference
For Frying
- Vegetable oil, canola oil, or peanut oil — enough to fill your skillet to a depth of at least 2 inches; peanut oil is the preferred choice for its high smoke point and neutral flavor
Pro Tip: The cornstarch-to-flour ratio in this coating is what separates a good chicken strip from a great one. Do not be tempted to skip or reduce the cornstarch — it is the single biggest difference between a coating that stays crispy and one that turns soft within minutes of leaving the oil.
Recipe Timing at a Glance
| Marinate Time | Prep Time | Cook Time | Total Active Time |
| 30 min – 4 hrs | 15 minutes | 20 minutes | ~35 minutes |
The active hands-on time for this fried chicken strips recipe is approximately 35 minutes — comparable to a drive to a fast food restaurant and back, but with results that are measurably better in flavor, texture, and freshness. The marinating period is passive time and can run anywhere from 30 minutes to 4 hours; the longer you marinate, the more tender and flavorful the chicken becomes. For maximum results, marinate overnight in the refrigerator.
Servings: 4 | Difficulty: Beginner to Intermediate | Cuisine: American
Step-by-Step Instructions for Fried Chicken Strips
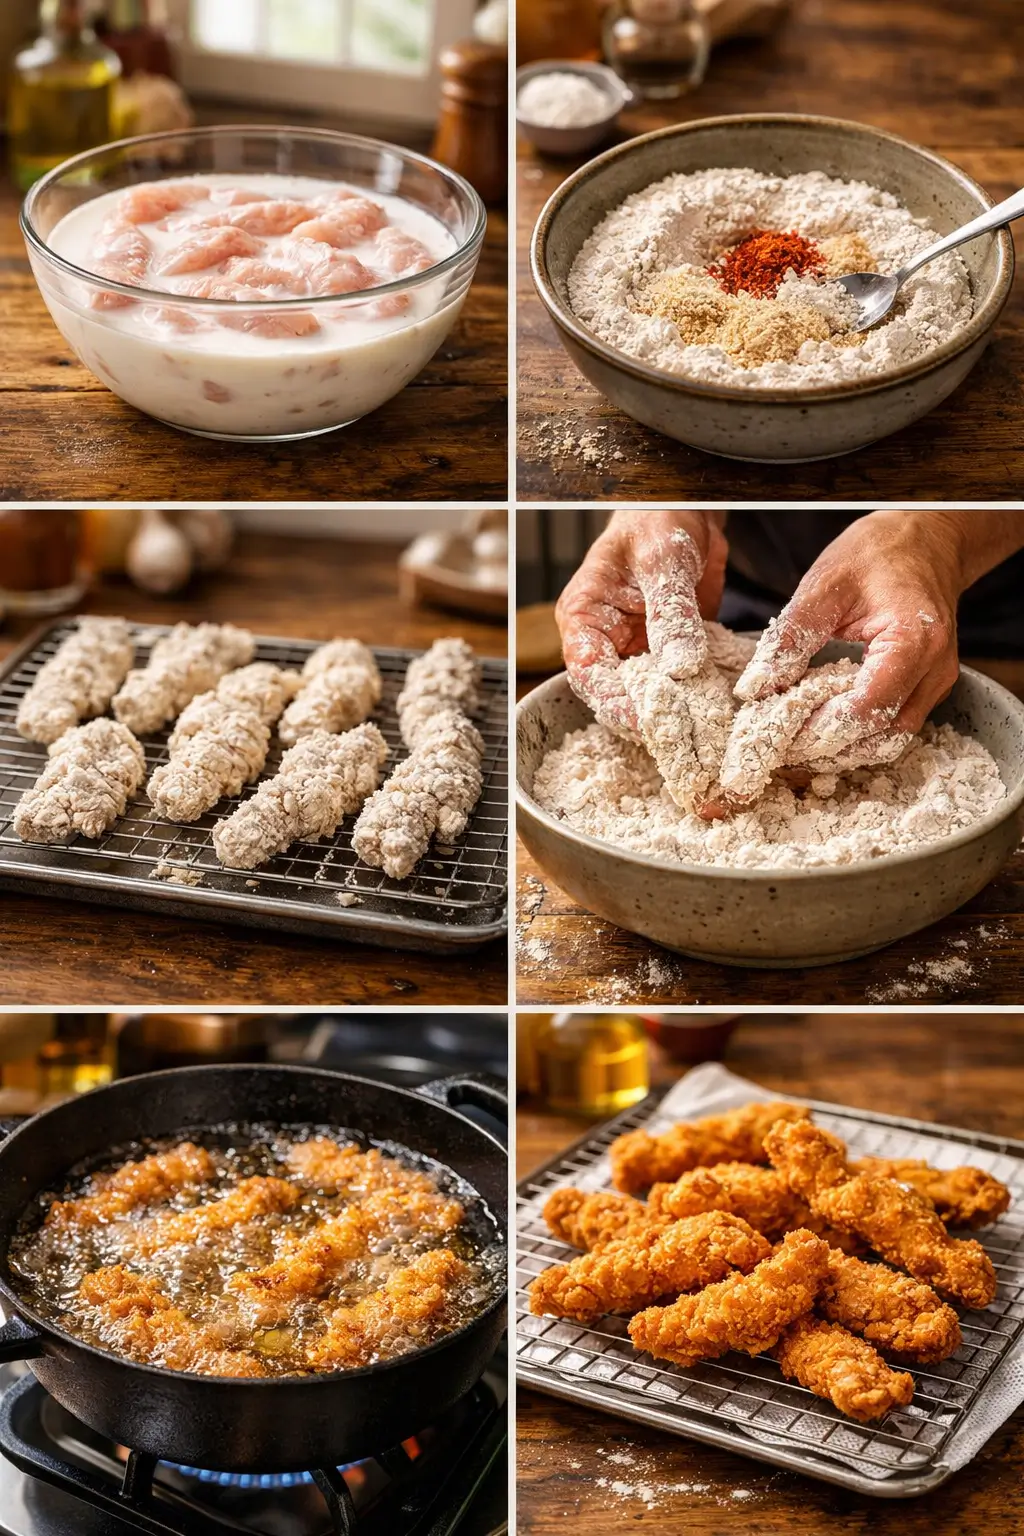
Step 1: Marinate the Chicken
Slice your chicken breasts into even strips if not using pre-cut tenders. Uniformity matters here — strips of similar size will cook at the same rate. In a large bowl or zip-lock bag, combine the buttermilk, hot sauce, salt, pepper, and garlic powder. Add the chicken strips and toss to coat every piece thoroughly. Press out the air if using a bag, seal, and refrigerate for a minimum of 30 minutes. If time allows, marinate for 2 to 4 hours, or overnight for the most tender result. Do not skip this step — the buttermilk marinade is what makes the difference between chewy, dry chicken strips and ones that are genuinely tender all the way through.
Step 2: Prepare the Coating
In a wide, shallow bowl or baking dish, whisk together the flour, cornstarch, salt, pepper, garlic powder, onion powder, smoked paprika, dried oregano, and cayenne pepper until evenly combined. The wide, shallow shape of the bowl is intentional — it makes dredging faster and more thorough than a narrow container. Taste a pinch of the coating mixture dry. It should be well seasoned and fragrant. If it tastes flat, add a little more salt. The coating must be well seasoned on its own because it forms the entire exterior of the finished strip.
Step 3: Dredge the Chicken
Remove the chicken strips from the buttermilk marinade one at a time, allowing the excess to drip off for a few seconds — but do not shake them completely dry. A thin layer of buttermilk clinging to the surface helps the coating adhere. Press each strip firmly into the flour mixture,
turning and pressing on all sides to ensure full, even coverage. For an extra-thick, extra-craggy crust, dip the coated strip back into the buttermilk briefly and dredge a second time. Place the coated strips on a wire rack and allow them to rest for 5 to 10 minutes before frying. This resting period lets the coating hydrate and bond to the surface, which dramatically reduces the chance of it sliding off in the oil.
Step 4: Heat the Oil to the Right Temperature
Pour oil into a large, heavy skillet or Dutch oven to a depth of at least 2 inches. Heat over medium-high heat until the oil reaches 350 degrees Fahrenheit. Use a cooking thermometer — this is not the place to guess. Oil that is too cool will produce greasy, soggy strips because the chicken absorbs oil instead of repelling it.
Oil that is too hot will burn the coating before the chicken is cooked through. At 350 degrees Fahrenheit, the coating seals almost instantly on contact, trapping moisture inside and producing a crust that is light, crispy, and grease-free.
Step 5: Fry in Batches
Carefully lower 4 to 5 chicken strips into the hot oil using tongs — never drop them in, as this causes dangerous splashing. Do not overcrowd the pan; adding too many strips at once drops the oil temperature significantly and results in uneven, greasy cooking.
Fry for 3 to 4 minutes per side, turning once, until the coating is deep golden brown and the internal temperature of the thickest strip reads 165 degrees Fahrenheit on an instant-read thermometer. Adjust the heat as needed between batches to keep the oil consistently at 350 degrees Fahrenheit. Transfer cooked strips to a wire rack set over a baking sheet — never to paper towels, which trap steam and soften the crust.
Step 6: Season Immediately and Serve
The moment the strips come out of the oil is the most important time to season them. Sprinkle a light pinch of flaky sea salt over the hot strips immediately — salt adheres best to the surface when the coating is still glistening from the oil. Serve within 10 minutes for peak crispiness. If cooking in multiple batches, keep finished strips warm in a 200 degree Fahrenheit oven on the wire rack while the remaining batches cook.
Nutritional Information (Per Serving — Approximately 4 Strips)
Here is the approximate nutritional breakdown per serving of 4 strips, based on pan-frying with canola oil and standard ingredient quantities:
| Nutrient | Amount |
| Calories | ~480 kcal |
| Protein | 38g |
| Total Fat | 22g |
| Saturated Fat | 4g |
| Carbohydrates | 32g |
| Dietary Fiber | 1g |
| Sugars | 2g |
| Sodium | ~820mg |
| Cholesterol | 105mg |
| Vitamin B6 | 40% DV |
| Phosphorus | 28% DV |
| Niacin (B3) | 65% DV |
Note: Nutritional values are estimates and will vary depending on the oil used, how long the strips drain, and the exact size of each piece. Values assume approximately 1 tablespoon of oil is absorbed per serving during frying, which is typical for properly temperature-controlled pan frying.
With 38 grams of protein per serving, this fried chicken strips recipe is a genuinely high-protein meal. Chicken breast is one of the leanest sources of complete protein available, and when fried correctly at the right oil temperature, the total fat absorbed is lower than most people expect.
Healthier Alternatives for the Fried Chicken Strips Recipe
Want all the satisfaction of crispy chicken strips with a lighter nutritional footprint? These swaps and techniques deliver exactly that:
- Air fryer method — spray the coated strips generously with cooking spray and cook at 400 degrees Fahrenheit for 12 to 14 minutes, flipping halfway through. The result is remarkably crispy with a fraction of the oil. This method reduces fat by approximately 60% compared to deep frying.
- Baked method — place coated strips on a wire rack over a baking sheet, spray with cooking spray, and bake at 425 degrees Fahrenheit for 20 to 22 minutes, flipping once. Less crispy than frying or air frying, but still very good and significantly lower in calories.
- Use chicken tenders instead of breasts — tenders are slightly higher in fat than breast meat but cook more evenly, stay juicier, and require less prep work. The nutritional difference is minimal.
- Substitute almond flour for half the all-purpose flour — reduces carbohydrates and adds healthy fats and fiber. The texture will be slightly denser but still satisfying.
- Greek yogurt marinade instead of buttermilk — equal parts plain Greek yogurt and water create an effective tenderizing marinade with more protein and less fat than buttermilk.
- Panko breadcrumb coating instead of flour — replace the flour mixture with seasoned panko breadcrumbs for a lighter, crunchier coating with slightly fewer calories per serving.
- Gluten-free adaptation — use a certified gluten-free all-purpose flour blend and gluten-free panko breadcrumbs. The results are nearly indistinguishable from the original when fried properly.
Serving Suggestions for Every Occasion
Fried chicken strips are one of the most versatile dishes in home cooking. Here is how to serve them in ways that go well beyond the standard dipping sauce routine:
- Classic Family Dinner — Serve alongside creamy mashed potatoes, coleslaw, and corn on the cob. Set out a selection of dipping sauces — honey mustard, ranch, barbecue, and buffalo sauce — and let everyone customize their plate.
- Chicken Strip Sandwich — Layer two strips on a toasted brioche bun with shredded lettuce, sliced pickles, and a generous spread of honey butter or spicy mayo. This rivals any fast food chicken sandwich at a fraction of the cost.
- Over a Waffle — The chicken-and-waffle combination is a Southern classic for good reason. The contrast between the crispy, savory strips and the soft, sweet waffle is one of the great flavor pairings in American food.
- Chicken Strip Salad — Slice the strips into pieces and arrange over a chopped romaine salad with cherry tomatoes, shredded cheddar, crispy bacon bits, and a drizzle of ranch or Caesar dressing.
- Wrap or Taco Style — Roll strips into a flour tortilla with shredded cabbage, sliced avocado, pickled jalapenos, and a lime crema for a crowd-pleasing handheld meal.
- Kids’ Meal Style — Serve with a simple side of mac and cheese and steamed broccoli for a plate that children will genuinely clean. The homemade version is far more nutritious than any fast food equivalent.
For dipping sauces beyond the standard options, try a honey sriracha glaze, a garlic Parmesan dip, or a simple lemon-herb aioli. These elevate the strips into something that feels genuinely special without any additional cooking.
Common Mistakes to Avoid
Fried chicken strips look simple, but a few common errors consistently produce disappointing results. Here is what to watch for and how to avoid each one:
1. Skipping the marinade: The buttermilk marinade is not optional. Chicken breast is a lean, low-fat protein that dries out quickly under high heat. The marinade tenderizes the meat and keeps it moist throughout frying. Even a 30-minute soak makes a measurable difference.
2. Not resting the coated strips before frying: Placing dredged strips directly into the oil gives the coating no time to bond to the surface. Resting for 5 to 10 minutes allows the flour mixture to hydrate and adhere, which reduces coating separation in the oil.
3. Incorrect oil temperature: This is the most common and most costly mistake in home frying. Oil below 325 degrees Fahrenheit produces greasy, heavy strips. Oil above 375 degrees Fahrenheit burns the coating before the chicken cooks through. Maintain 350 degrees Fahrenheit consistently.
4. Overcrowding the pan: Adding too many strips at once drops the oil temperature dramatically, leading to uneven cooking and a soggy crust. Fry in small batches of 4 to 5 strips maximum, depending on your pan size.
5. Draining on paper towels: Paper towels trap steam underneath the strips, which rapidly softens the crust. Always drain on a wire rack elevated above a baking sheet so air circulates on all sides.
6. Under-seasoning the coating: The flour mixture must be boldly seasoned because it is the only layer of seasoning on the exterior of the finished strip. Taste it before dredging and adjust accordingly.
7. Cutting into strips to check doneness: Cutting releases steam and juices and makes the strips less appealing on the plate. Use an instant-read thermometer instead. The target internal temperature is 165 degrees Fahrenheit.
Storing Tips for Your Fried Chicken Strips
Fried chicken strips are at their absolute best straight from the oil, but they store and reheat better than almost any other fried food when handled correctly.
Refrigerating
Allow strips to cool completely on a wire rack before storing — never stack them while still warm, as the trapped heat creates moisture that softens the coating. Transfer to an airtight container with a layer of parchment paper between each layer of strips. Refrigerate for up to 3 days. To reheat and restore crispiness, place strips on a wire rack over a baking sheet and bake at 400 degrees Fahrenheit for 10 to 12 minutes. Do not microwave — it destroys the crust entirely and makes the coating dense and chewy.
Freezing
Fried chicken strips freeze exceptionally well. Cool completely, then freeze in a single layer on a parchment-lined baking sheet for 1 to 2 hours until solid. Transfer to a freezer bag or airtight container with parchment between layers. Freeze for up to 2 months. To reheat from frozen, bake directly at 400 degrees Fahrenheit for 18 to 20 minutes, flipping halfway through, until heated through and crispy.
Freezing Uncooked Strips
You can also freeze the strips after dredging but before frying. Arrange the coated strips on a parchment-lined baking sheet and freeze until solid, then transfer to a freezer bag. Fry directly from frozen at 325 degrees Fahrenheit — slightly lower than usual — for 6 to 7 minutes per side, giving the chicken time to cook through before the coating browns too quickly.
Make-Ahead Tip
The buttermilk marinade and the flour coating mixture can both be prepared up to 24 hours in advance. Store the marinade with the chicken in the refrigerator and the coating mixture in an airtight container at room temperature. When ready to cook, the dredging and frying process takes under 30 minutes from start to finish.
Final Thoughts: The Only Fried Chicken Strips Recipe You Will Ever Need
This fried chicken strips recipe delivers everything you want — shatteringly crispy coating, juicy chicken, bold seasoning — in under 35 minutes of active time. With smart storage options, easy healthier swaps, and endless serving versatility, it earns its place as a permanent fixture in your recipe collection. Try it tonight.
Did you make this fried chicken strips recipe? Leave a rating and share your experience in the comment section below. We love hearing how it turns out in your kitchen. Share this recipe with someone who loves great fried chicken, and subscribe to our newsletter for new recipes, cooking guides, and kitchen tips every week.
>>> Subscribe for New Recipes Every Week!
Frequently Asked Questions (FAQs)
Q: Can I use chicken thighs instead of chicken breasts for this recipe? Yes, and many experienced cooks actually prefer thighs for fried chicken strips. Chicken thighs have a higher fat content, which means they stay juicier under the high heat of frying and are significantly more forgiving if you cook them slightly past the target temperature. The flavor is also richer. Slice boneless, skinless thighs into strips of similar size to the breast strips and follow the recipe exactly as written.
Q: How do I keep fried chicken strips crispy after cooking? The two most important steps are draining on a wire rack rather than paper towels, and serving within 10 minutes of frying. If you need to hold them longer, place the strips on a wire rack over a baking sheet in a 200 degree Fahrenheit oven. This keeps them warm without continuing to cook them and allows air to circulate so the crust stays dry. Avoid covering them with foil, which traps steam.
Q: What oil is best for frying chicken strips? Peanut oil is the top choice for its high smoke point of approximately 450 degrees Fahrenheit and its clean, neutral flavor. Canola oil and vegetable oil are excellent, widely available alternatives. Avoid olive oil, coconut oil, and butter for frying — they have smoke points that are too low for sustained high-heat frying and will impart off-flavors to the coating.
Q: How do I make the coating extra crispy? Three techniques produce maximum crispiness: adding cornstarch to the flour mixture at a ratio of roughly one part cornstarch to four parts flour; double-dredging the strips by dipping them back into the buttermilk after the first coating and dredging again; and resting the coated strips on a wire rack for 5 to 10 minutes before frying so the coating has time to bond and hydrate.
Q: Is it safe to reuse the frying oil? Yes, with conditions. Strain the used oil through a fine-mesh strainer lined with cheesecloth to remove any coating particles, which burn and turn bitter if left in the oil. Store the strained oil in a sealed container at room temperature and use within 1 to 2 weeks, or refrigerate for up to a month. Discard oil that has turned dark, developed an off smell, or begun to foam excessively during frying.
Q: Can I make this recipe gluten-free? Yes. Replace the all-purpose flour with a certified gluten-free all-purpose flour blend and ensure your cornstarch is also certified gluten-free — most brands are, but cross-contamination can occur during processing. Check that your hot sauce and other condiments are gluten-free as well. The rest of the recipe requires no changes.
Q: What internal temperature should the chicken reach? The USDA recommends a minimum internal temperature of 165 degrees Fahrenheit for all poultry. Use an instant-read thermometer inserted into the thickest part of the largest strip to verify doneness. At the correct frying temperature of 350 degrees Fahrenheit, strips of standard size will reach this temperature in approximately 6 to 8 minutes of total frying time.
Related Recipes You Might Love:
- Crispy Buttermilk Fried Chicken Thighs
- Honey Garlic Chicken Wings
- Southern-Style Chicken and Waffles
- Air Fryer Chicken Nuggets